This article has been rewritten and reorganized using artificial intelligence (AI) based on referenced technical documentation. The purpose is to present the content in a clearer and more accessible manner. For technical clarifications or further verification, readers are advised to consult the original documentation or contact relevant technical personnel.
Hey everyone! Whether you’re an AE or sales representative on the front lines, or a potential customer curious about Advantech’s technology, today we’re going to talk about a technology that makes software deployment as simple as “packing a suitcase” – Docker!
In the rapidly changing world of Industrial IoT, our hardware platforms are becoming increasingly diverse, ranging from edge devices to industrial PCs, each with different specifications. Deploying various applications (especially increasingly complex AI applications) stably and quickly on these different devices is often a headache. Traditional deployment methods may require tedious configuration and dependency installation for each device environment, which is time-consuming and prone to errors.
This is where Docker comes in like a savior! You can think of Docker as a standardized “shipping container.” Each container holds everything needed for an application to run: code, libraries, system tools, configuration files, and so on. This container is independent and isolated, meaning that no matter where you open it, the contents look exactly the same, and the runtime environment is identical. This means the phrase “it works on my machine” can finally be realized on different devices!
Advantech’s engineers also saw the huge potential of Docker in simplifying deployment and improving efficiency. To verify the feasibility and advantages of this technology on our hardware platforms, we conducted a series of experiments. Next, let’s take a look at the exciting process of this “Docker First Experience”!
Experiment Revealed: Building Your Docker Environment Step by Step #
The goal of this experiment is clear: to build a Docker environment from scratch on an Advantech hardware platform, attempt to run an application containing multiple packages, and finally package this environment for quick future deployment.
Step 1: Prepare the Base Environment
First, we need a basic operating system to serve as the base for the Docker container. Imagine this as preparing a clean floor for your container. We chose the widely used Ubuntu 22.04 version.
$ docker pull ubuntu:22.04
This command tells Docker to download the Ubuntu 22.04 image, which is the template for creating containers.
Next, we start a container based on this image.
$ docker run -it --privileged=true --net=host ubuntu:22.04
This command is a bit long, let’s briefly explain:
docker run: Start a new container.-it: Allows you to enter the container’s terminal in interactive mode.--privileged=true: Gives the container higher privileges, convenient for performing some system-level operations (commonly used during the experimental phase).--net=host: Allows the container to use the host’s network directly instead of an isolated network space, which is useful in scenarios requiring direct access to host network resources.ubuntu:22.04: Specifies which image to use to start the container.
Sometimes, we may need to mount certain folders from the host into the container for data exchange. In this case, we add the -v parameter:
$ docker run -it --privileged=true --net=host -v /run/media/root-mmcblk2p2:/mnt -e TARGET_DIR=/mnt ubuntu:22.04
Here, -v /run/media/root-mmcblk2p2:/mnt mounts the /run/media/root-mmcblk2p2 path on the host to the /mnt path inside the container. -e TARGET_DIR=/mnt sets an environment variable.
Step 2: Optimize Storage Space
On embedded or industrial PCs, storage space management is important. Docker defaults to storing container and image data in /var/lib/docker. If we want to store this data on a larger disk partition (e.g., /dev/mmcblk2p2 on an SD card), we need to move Docker’s data root directory.
First, stop the Docker service:
sudo systemctl stop docker
Then, move the existing Docker data to the new location:
sudo mv /var/lib/docker /run/media/root-mmcblk2p2/docker
Next, modify Docker’s configuration file to tell it the new data location:
sudo nano /etc/docker/daemon.json
In the opened file, add or modify the following content:
{
  "data-root": "/run/media/root-mmcblk2p2/docker"
}
After setting the new path, ensure the Docker service has permission to access this folder:
sudo chown -R root:docker /run/media/root-mmcblk2p2/docker
After completing these steps, you can restart the Docker service. If there were containers running before, you can use the following commands to restart and enter them:
docker start <my_container_id>
docker attach <my_container_id>
(<my_container_id> is your container’s unique identifier, which can be viewed with docker ps -a)
Step 3: Install Required Packages Inside the Container
After entering the container, this environment is like a fresh Ubuntu system. We can install software just like on a regular Linux system.
First, update the package list:
apt-get update
Then install some common tools and development packages:
apt-get install vim git build-essential checkinstall cifs-utils nfs-common software-properties-common strace wget unzip
To run specific applications (such as those involving image processing and AI), we also need to install more libraries and Python packages.
Update the package list again (to ensure the latest versions of packages can be installed):
apt-get update
Install compilation tools, development libraries, and Python-related packages:
apt update && sudo apt install -y build-essential cmake python3-dev libboost-all-dev libopenblas-dev liblapack-dev libx11-dev xvfb && pip install opencv-python dlib face_recognition numpy python-vlc
Here we installed many things at once, including build-essential and cmake required for compiling code, mathematical operation libraries libopenblas-dev, liblapack-dev, and graphics display related libx11-dev, xvfb. The subsequent pip install installs Python packages for image processing (opencv-python), face recognition (dlib, face_recognition), numerical computation (numpy), and audio/video playback (python-vlc).
If you only need to install Python packages, you can use this command:
pip install opencv-python dlib face_recognition numpy python-vlc
Step 4: Prepare and Test the Application
Some applications require a graphical interface or display output. In this case, you need to set the DISPLAY environment variable to let the container know where to display the output:
export DISPLAY=:0
Next, we copy the application’s code (e.g., a Python script play_video_ai.py) into the container.
First, temporarily exit the container (type exit) and return to the host’s terminal. Use docker ps -a to view the container ID.
exit
docker ps -a
Then use the docker cp command to copy the file from the host to the container:
docker cp <your_file> <my_container_id>:/home/
(Replace <your_file> with the path to the file you want to copy, and <my_container_id> with your container ID)
After copying, enter the container again:
docker start <my_container_id>
docker attach <my_container_id>
Now, we can run the application inside the container for testing!
cd ~/video_test/
python3 ./play_video_ai.py
If everything goes smoothly, you should see the application’s output, such as playing a video or performing image analysis.
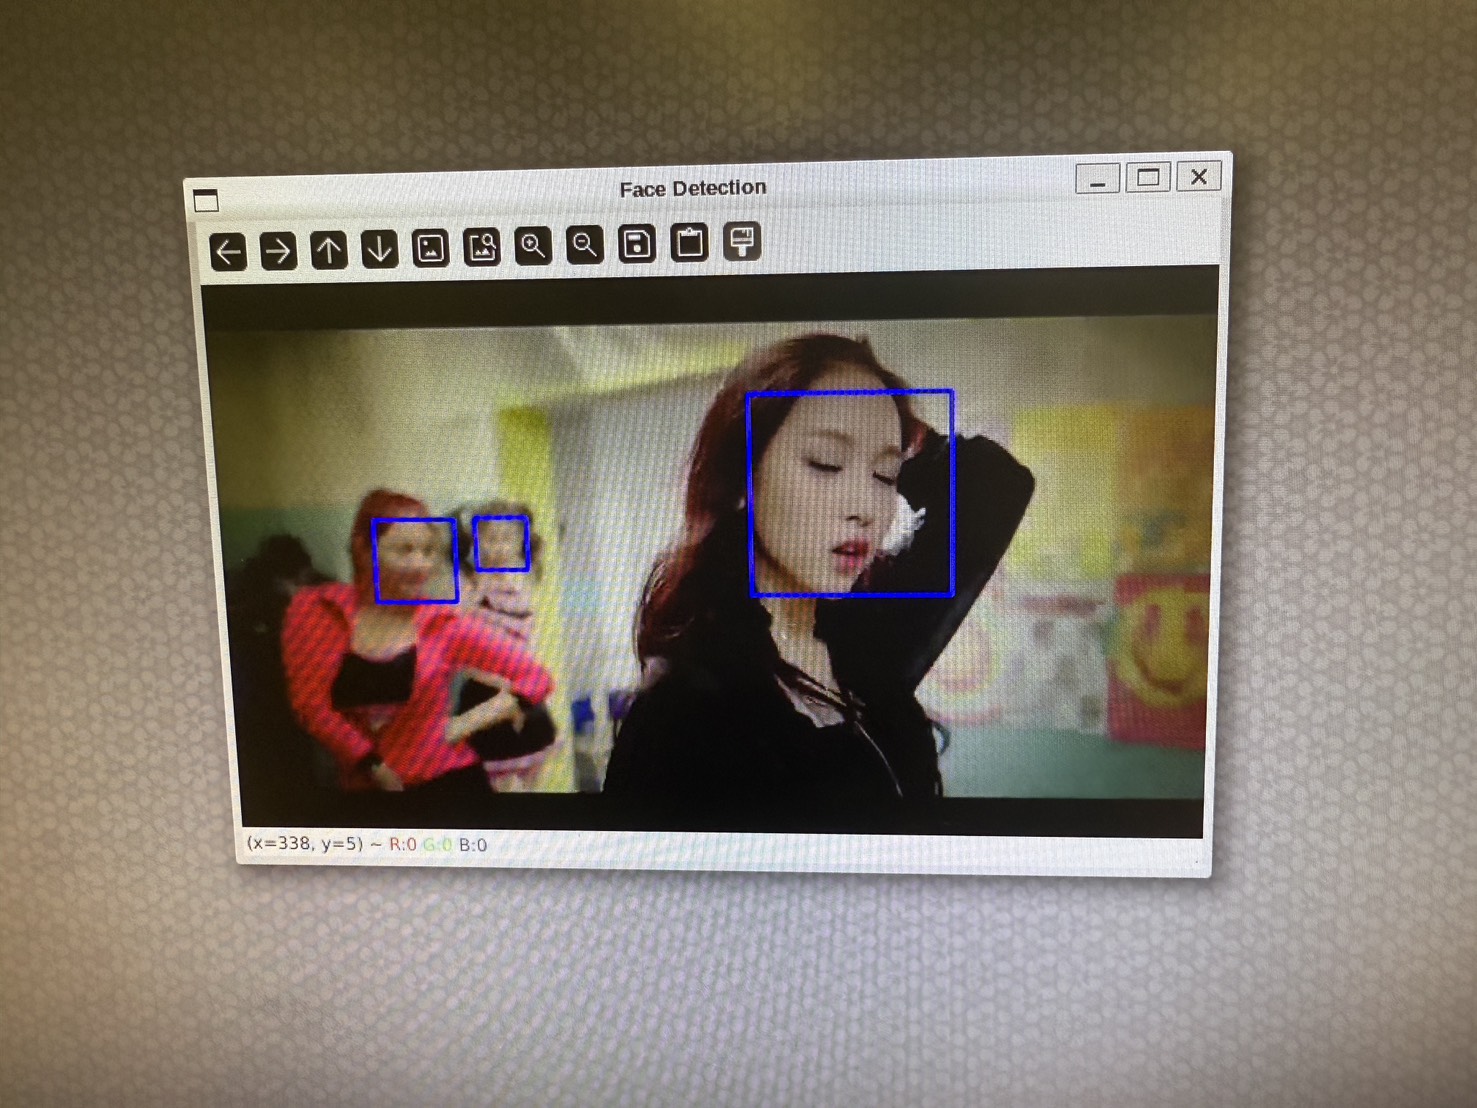
This image is proof that the application ran successfully! It shows that within the Docker container, we successfully ran a Python application involving image processing.
Results and Application: Packaging Your Exclusive Application Container #
The Docker first experience experiment successfully demonstrated how to build, configure, and run complex applications within a Docker container on Advantech hardware platforms, and package it for quick replication and deployment. This technology is of significant importance for simplifying the software lifecycle management in Industrial IoT and edge computing.
Through Docker, we can:
- Ensure environment consistency: Avoid the problem of “it works on my machine, but not on yours.”
- Accelerate deployment: Package once, run anywhere, greatly reducing on-site deployment and update time.
- Improve efficiency: Standardized processes reduce the workload of manual configuration and debugging.
- Enhance isolation: Different applications run in their respective containers without interfering with each other, improving system stability.
Advantech is always committed to exploring and integrating the latest technologies to provide customers with better and more convenient solutions. This successful Docker experiment is just a microcosm of our continuous investment in R&D in the field of containerization technology. In the future, we will continue to delve deeper into Docker and other containerization technologies, aiming to provide more pre-configured Docker images covering various common industrial applications and AI inference frameworks, allowing customers to more easily develop and deploy their innovative applications on Advantech platforms.
Stay tuned for more exciting advancements from Advantech in the field of containerization technology!